Choosing the right power rack is a pivotal decision when building your home gym. It’s more than just equipment; it’s the foundation of strength training.
A quality rack brings safety, versatility, and the freedom to push your limits, all within the comfort of your home.
Understanding how to pick the best one ensures your home gym is a place where goals are reached and personal records are set.
Let’s get started!
Table Of Contents
Key Takeaways
| Aspect | Recommendations |
| Types of Racks | Power, Half, Folding, Squat Stand, and Combo Rack. |
| Choosing the Right Type Of Rack | Base on your space, workout style, and long-term training goals. |
| Space & Dimension Considerations | Rack depths of 24”-30” inside the rack will ensure proper space, a height of 72” or more based on ceiling height, and a width of 47”-53” making sure it’s not too wide for your barbells. |
| Assess the Build Quality | 11 gauge steel and tubing sizes of 2×3” or 3×3” have the highest strength and compatibility. |
| Consider Safety and Stability | High weight capacity of at least 1,000 lbs, solid safety bars or straps included or upgrade option. |
| Rack Features | Hole numbering is nice, 1” spacing between holes is preferred, 5/8” or 1” hole sizes, finish options (powder-coated). |
| Financial Aspects | Set a budget, look for a solid lifetime warranty on the frame, verify shipping costs, and understand the return policy. |
What Is A Power Rack?
A power rack is essentially your workout partner, designed to support you during heavy lifting sessions. It’s the framework that holds the barbell at your preferred height, ensuring you can start and end each set safely.
Whether you’re gearing up for squats or gearing down after an intense bench press, this equipment stands as your reliable spotter, making it a must-have for anyone serious about their training.
History Of The Power Rack
The power rack’s story is closely tied to the squat’s evolution. In the early days, what we now know as the squat was a lighter exercise called the “deep knee bend.” The game changed when Henry Steinborn introduced a technique to lift serious weight, reshaping the squat into a key strength-building move. This shift sparked the need for a specialized structure, leading to the creation of the squat rack.
From those early versions, we’ve come a long way. The modern power rack, a direct descendant, is more than just support for heavy squatting. It’s a multifunctional hub, ensuring safe and diverse workouts. It’s fascinating how an exercise and its equipment have evolved together, turning home gyms into comprehensive training grounds.
Types of Racks
Navigating the world of racks can get a bit overwhelming with all the choices out there. Let’s break it down to help you pick the right one for your gym.
Power Racks/Squat Rack/Power Cage
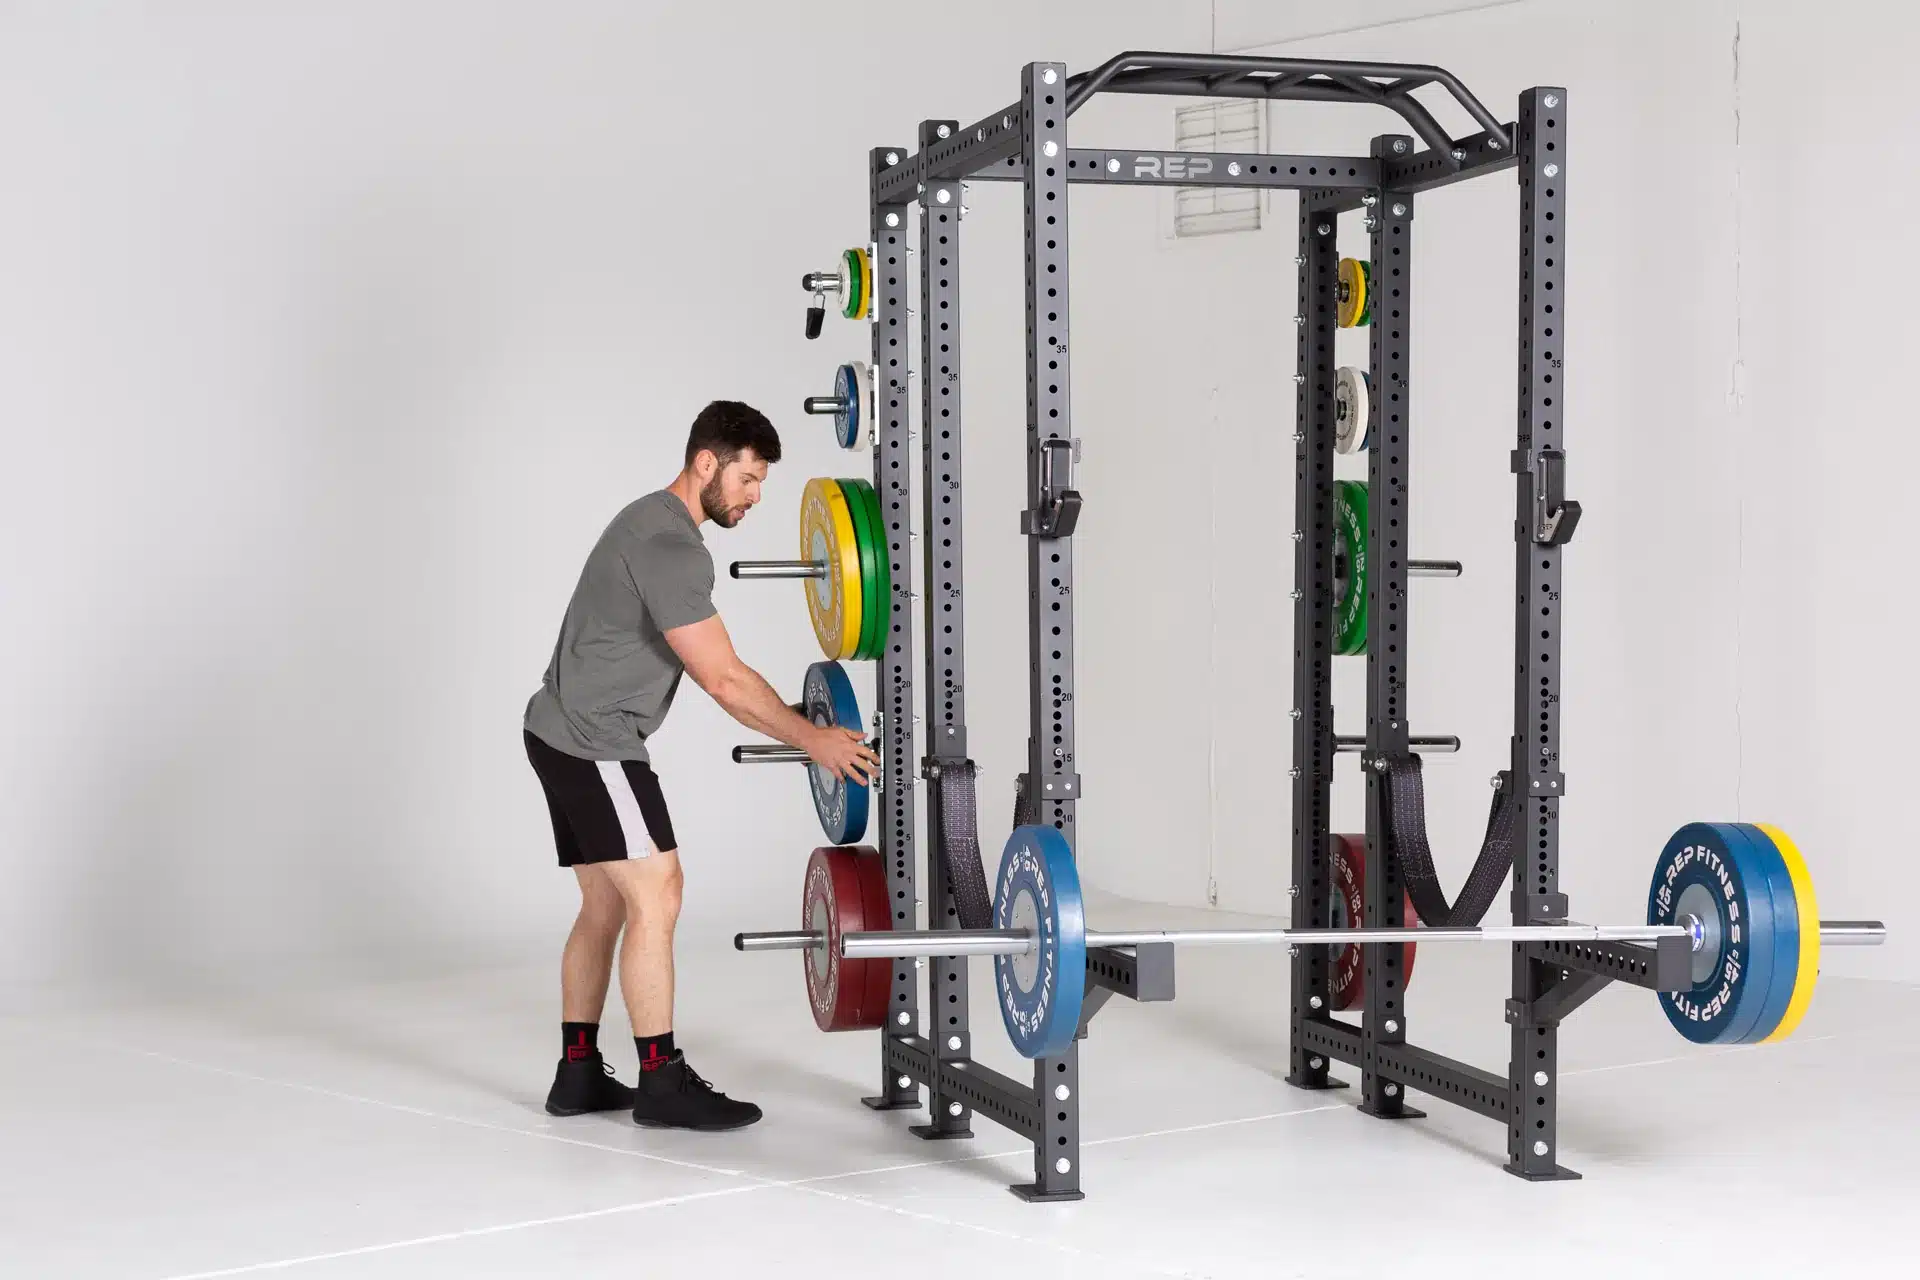
Power racks, squat racks, power cages – they’re all the same basic thing but are used interchangeably for the most part. The Power Rack stands as the undisputed cornerstone of any serious garage gym. Characterized by its solid, four-post structure, it’s engineered to withstand the rigors of heavy, intense lifting sessions.
Here’s what sets it apart:
- Solid Framework – The power rack’s steel construction promises stability. Whether you’re loading up for squats or setting up for a heavy bench press, this rack doesn’t flinch.
- Safety First – Equipped with adjustable safety bars, it offers a safety net during your solo lifting sessions. These bars can be set to catch the weight if you can’t complete a lift, providing peace of mind when you’re pushing your limits.
- Versatile Exercise Hub – With a power rack, your exercise options expand significantly. From squats and bench presses to pull-ups and deadlifts, it supports a full spectrum of strength-training exercises. Attachments like dip bars or lat pulldowns can further extend its capabilities.
- Durability for the Long Haul – Designed to endure, a quality power rack can be a one-time investment that grows with you. It’s not just about surviving the wear and tear; it’s about providing a consistent, reliable base for your training year after year.
Half Rack
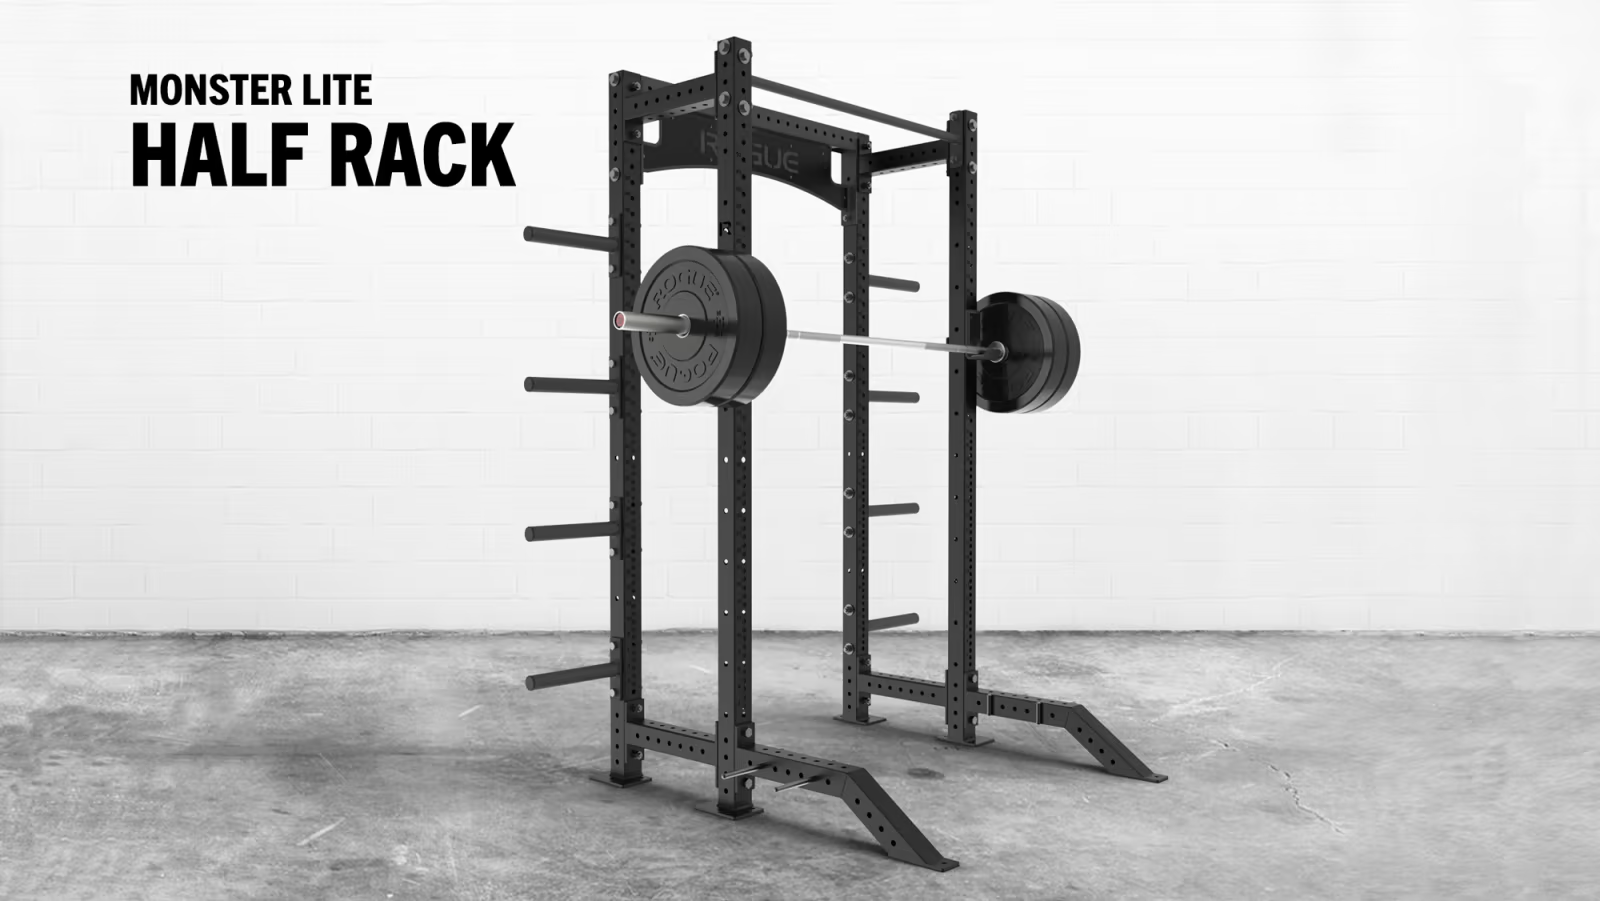
The Half Rack is a brilliant solution when space is at a premium but compromise on quality isn’t an option. It’s like getting the core benefits of a power rack without the full footprint.
Here’s why it stands out:
- Space-Efficient Design – With its two uprights, this type of rack fits snugly into smaller areas, making it ideal for home gyms where every inch counts. It offers the sturdiness you need for heavy lifts without dominating your space.
- Open Access – Unlike the enclosed structure of a full power rack, this rack’s open design provides easy access and more room for movement, particularly beneficial for dynamic exercises like lunges or power cleans.
- Integrated Storage – Many half racks come with built-in storage for weight plates, keeping your workout area tidy and weights within arm’s reach. This feature is a real space saver and adds to the rack’s stability.
Folding Rack
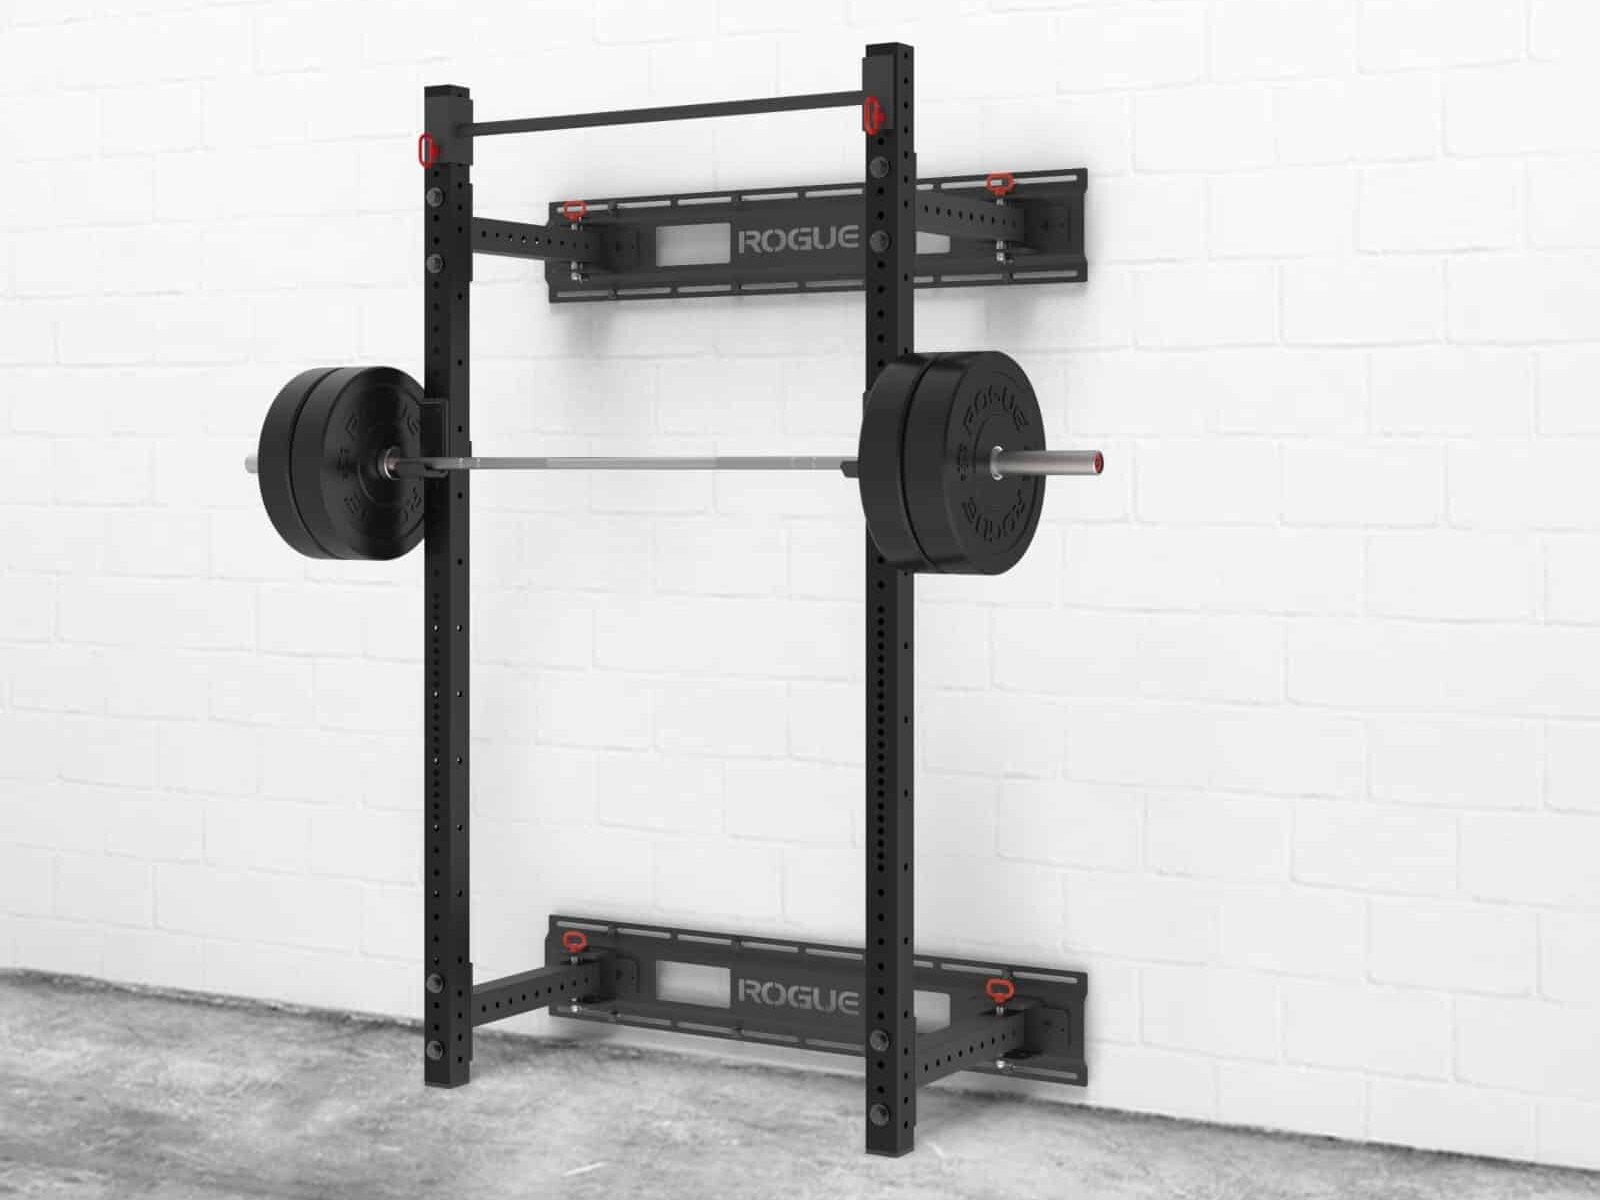
The Folding Rack is a game-changer for those of us who need to make every square foot count. It’s the epitome of functionality meeting practicality, a true testament to modern home gym design.
Here’s why it is a great choice for many lifters:
- Ultimate Space Saver – Mounted to your wall, this rack folds out for a workout and tucks away neatly when you’re done. It’s the ideal solution for multipurpose spaces – your living room or garage can transform into a gym in no time.
- Quick Setup – When it’s time to train, a folding rack can be set up in moments. Its user-friendly design means less time prepping and more time lifting.
- Considered Features – Many folding racks come with adjustable J-hooks and pull-up bars, ensuring you can still enjoy a variety of exercises. And while they might not have all the bells and whistles, the core of a great workout is there.
Squat Stand
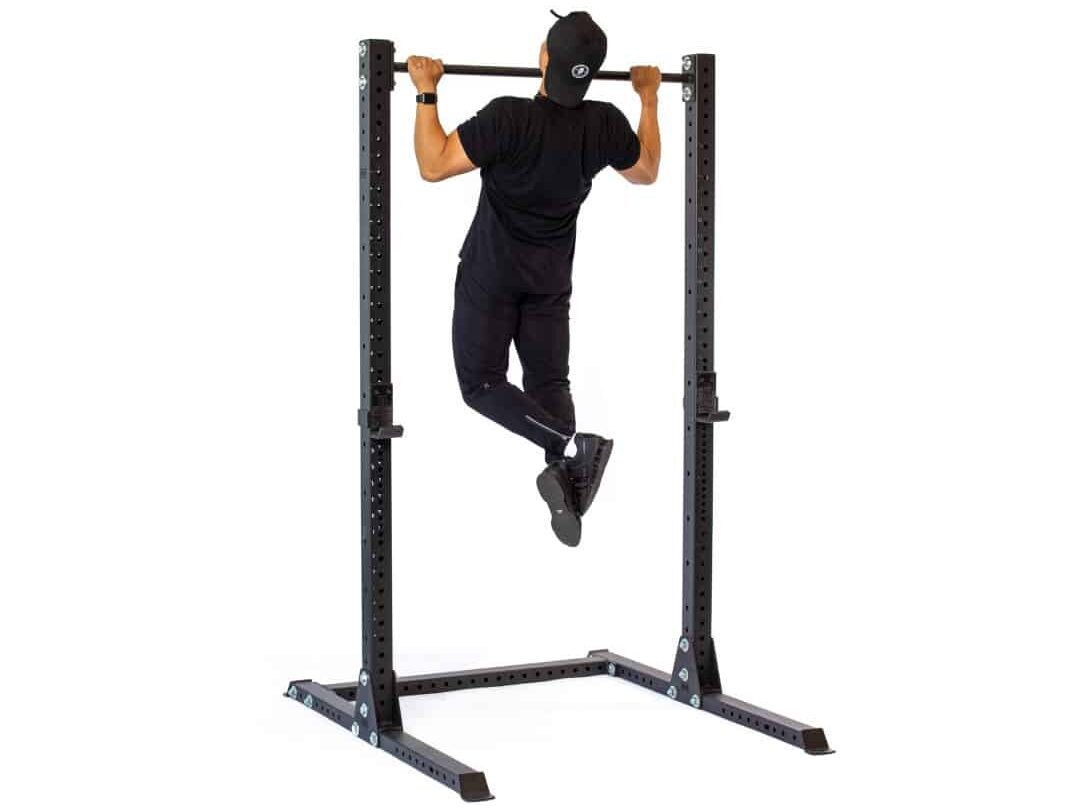
The Squat Stand is simplicity at its best, a no-frills solution tailored for lifters who appreciate minimalism and functionality.
Here’s the lowdown on why it’s a solid pick:
- Streamlined Design – Consisting of just two uprights, this stand supports your barbell without any unnecessary bulk. It’s the epitome of straightforward, efficient design.
- Space-Friendly Footprint – Perfect for tighter areas, the squat stand takes up minimal space. It allows you to maintain a clean, open workout area, making it ideal for smaller gyms or multi-use spaces.
- Focused Training – If your routine revolves around squats, overhead presses, or other barbell exercises, the squat stand meets your needs without complexity. It’s all about getting the job done well, with no distractions.
- Portable and Convenient – Many squat stands are relatively lightweight and movable, offering the convenience of reconfiguring your space as needed or storing the stand when not in use.
Combo Rack
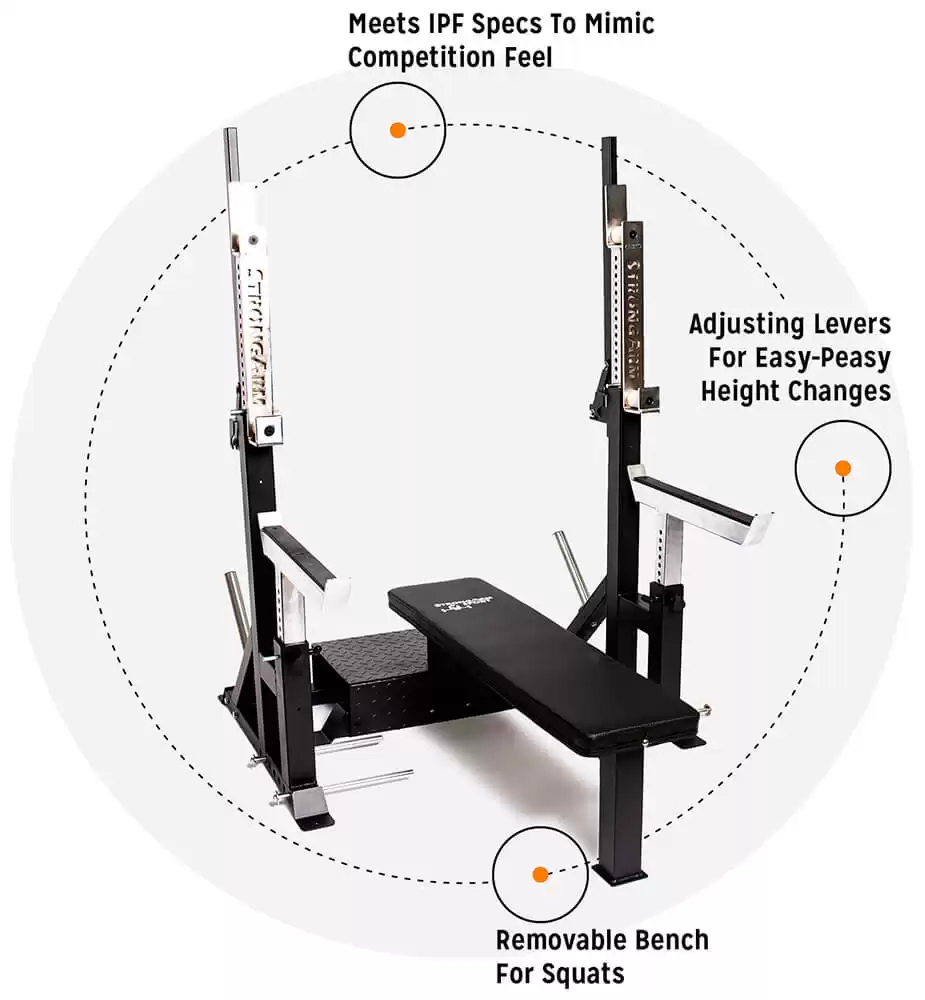
The Combo Rack is the multitasker of gym equipment, brilliantly blending the strengths of a power rack and a squat stand. It’s designed for those who crave variety and efficiency in their workouts.
Here’s what makes the combo rack an excellent choice:
- Hybrid Versatility – With the combo rack, you get the sturdiness of a power rack and the sleekness of a squat stand.
- Space-Efficient Solution – While offering a range of features, the combo rack is thoughtfully designed to maximize space. It provides the functionality of two racks without requiring double the room, making it a smart choice for optimally utilizing your gym space.
- Customizable Setup – Many combo racks come with adjustable components and attachments, allowing you to tailor your setup to your specific training needs.
How To Choose A Rack
Selecting the right rack is a crucial step in crafting your ideal home gym. It’s not just about fitting a piece of equipment into your space; it’s about choosing a partner that matches your goals and grows with you.
Let’s navigate through the essentials to find the rack that’s just right for you.
Choose the Right Type
Choosing the right type of rack is about aligning the type of training you plan to do with your available gym space. Here’s how you can make the right pick:
- Assess Your Space – Before you decide, take a good look at where your rack will live. Do you have a generous space? A full-size power rack might be perfect. Working with a tighter area? A half or folding rack could be your best bet.
- Define Your Workouts – What’s your training style? If you’re into heavy lifting and a variety of exercises, a power or combo rack offers versatility and safety. If you’re focused mainly on squats or bench presses, a squat stand or half rack might suffice.
- Think Long-Term – Consider how your training might evolve. Investing in a rack that can adapt to new routines means you won’t need to upgrade every time your workout changes.
Space & Dimension Considerations

When it comes to integrating a rack into your home gym, size, and fit aren’t just details—they’re what make your workout space functional and effective. Here’s how to nail down the space and dimension considerations, ensuring your power rack fits your space.
- Overall Footprint – Before you pick a rack, measure your space. You’ll want a few feet of clearance around it for easy movement. Don’t forget to factor in the space for a loaded barbell.
- Depth – Most racks have between 16”-41” of space depending on the type. You’ll want about 24 to 30” of depth so you have enough room while training. If space is tight, there are shallower options, but make sure they don’t restrict your movements.
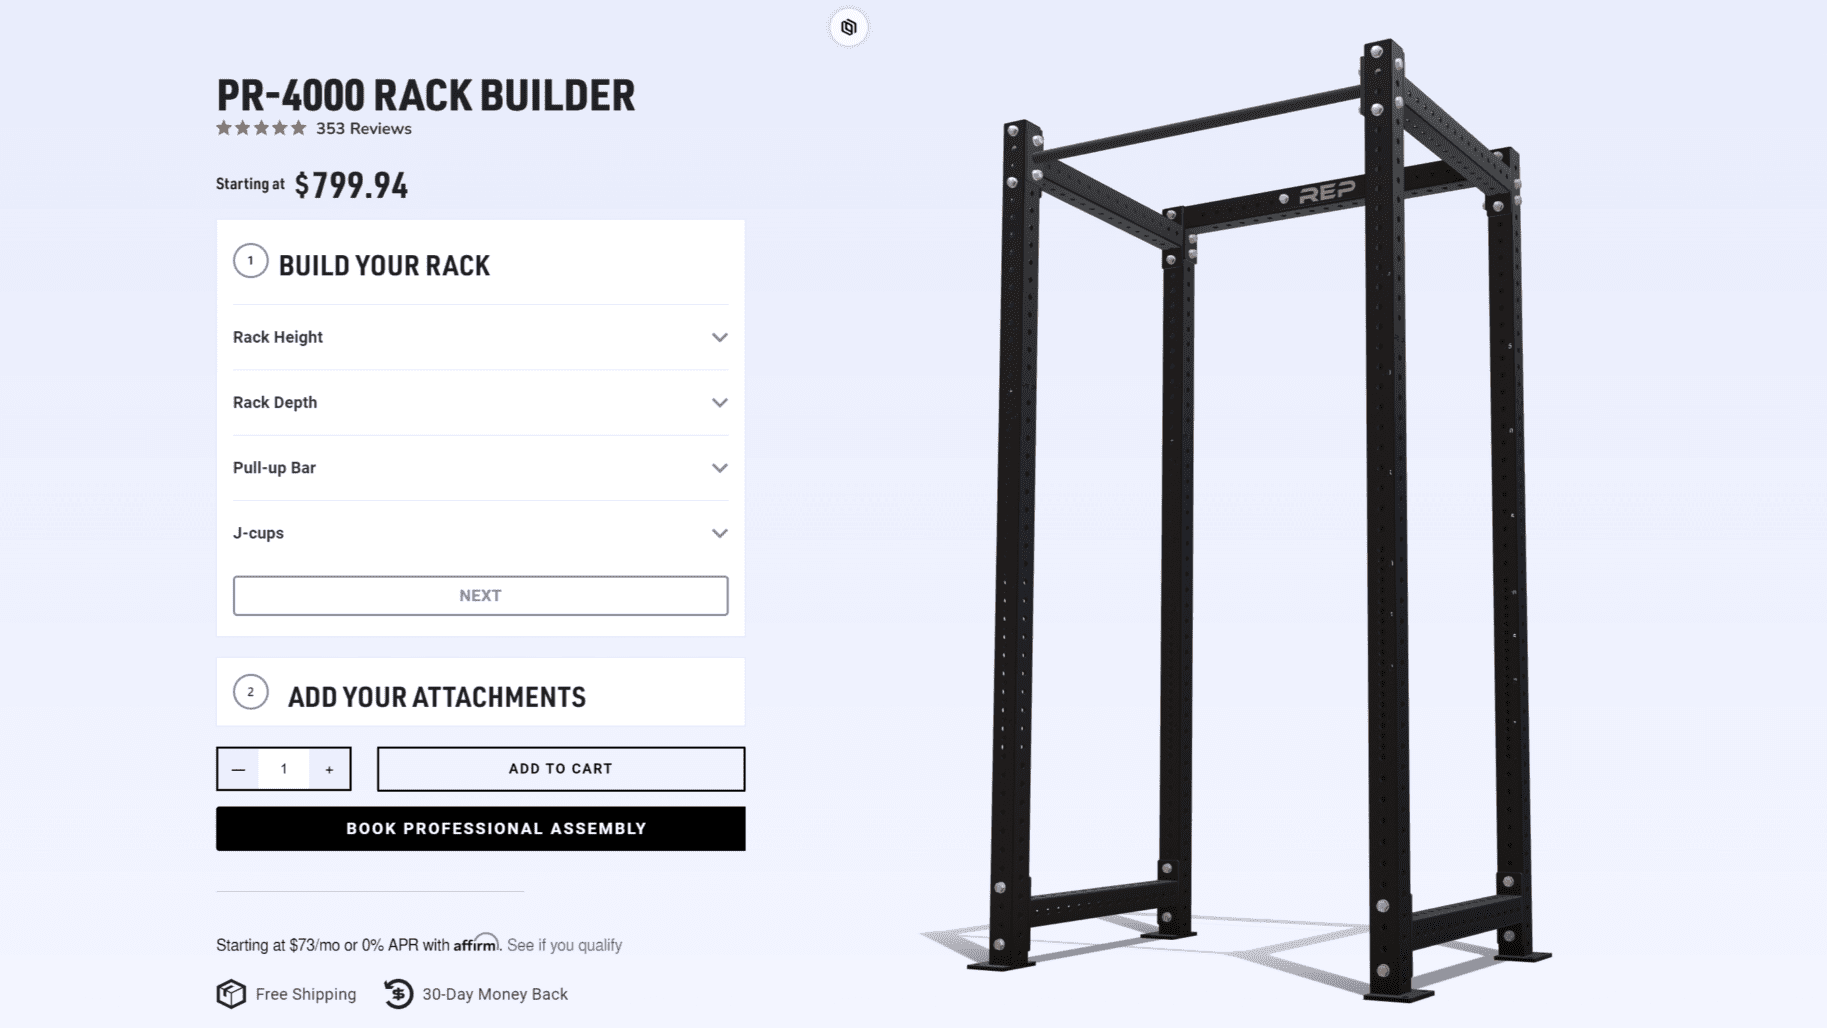
- Height – Match the rack height with your ceiling. Most racks tend to be 72” tall or higher. My PR-4000 is offered in 80” and 93” models. I went with the 80” option as the taller version wouldn’t have fit well with my garage door opener.
- Width – Your rack should fit your barbell and give you room to move. Around 47”-53” is typical and works well for standard barbells. Check that the width suits your bars and lifting style.
Assess the Build Quality
Assessing the build quality of your rack is non-negotiable; it’s about safety and longevity. Here’s how you can ensure you’re getting a sturdy and reliable rack:
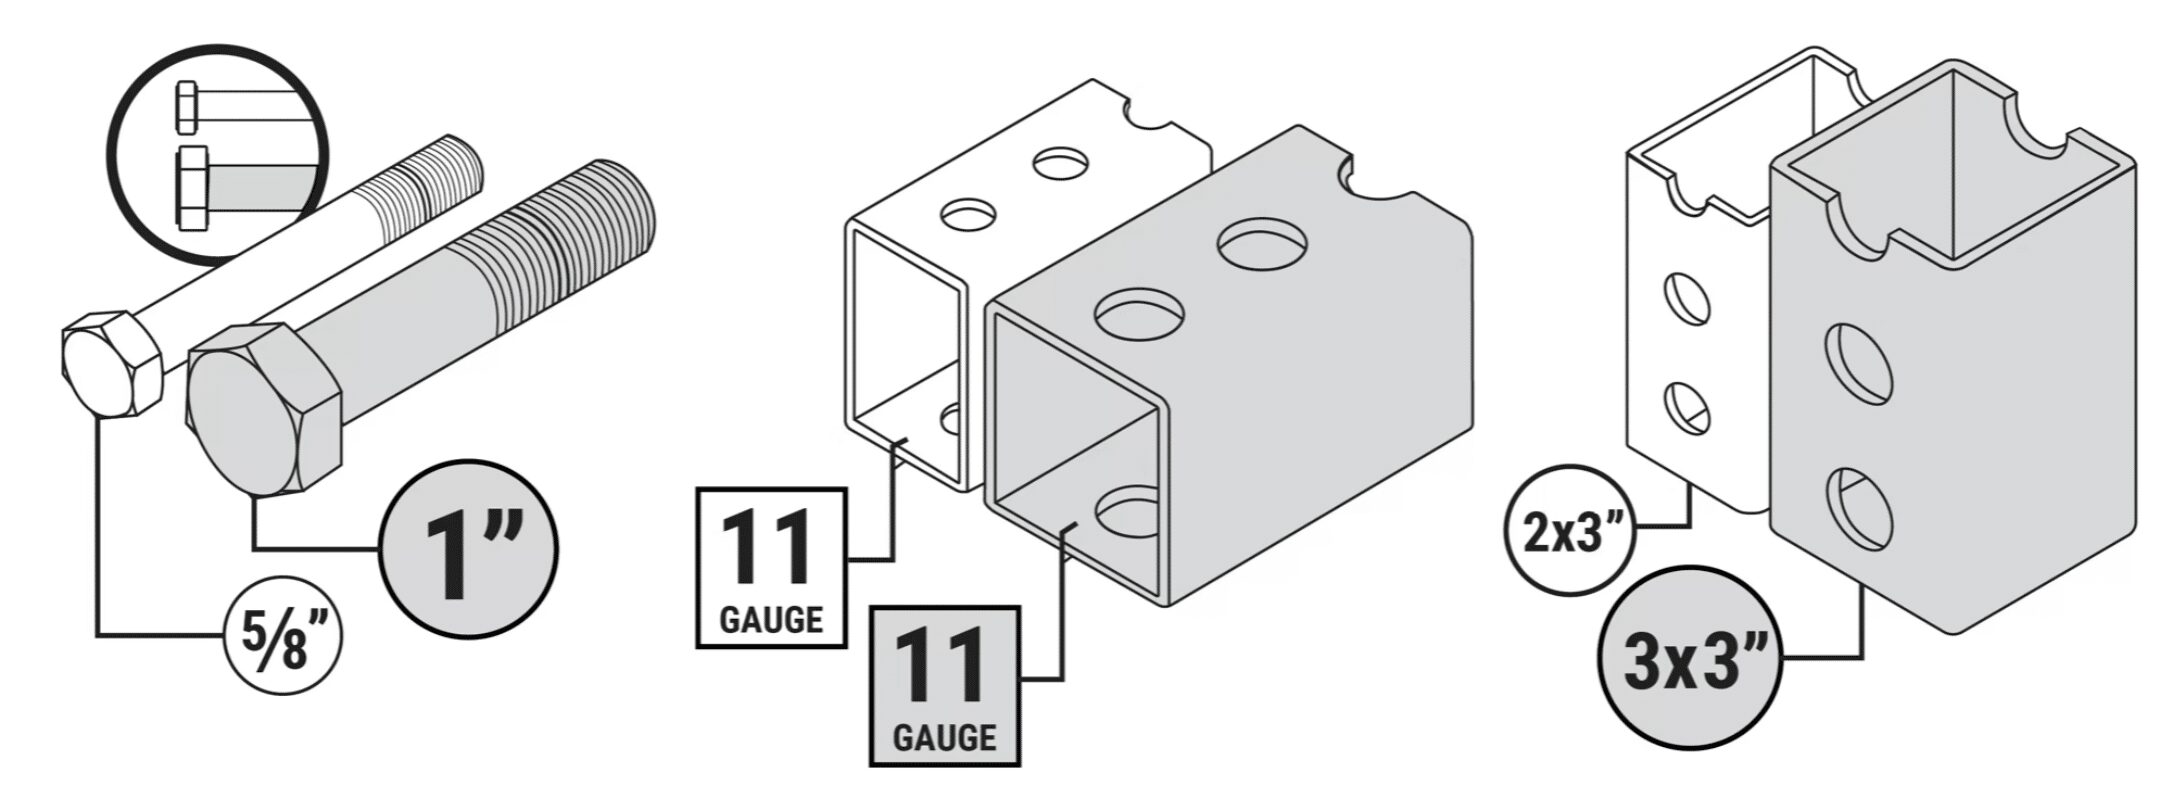
- Gauge of the Steel – Thicker steel means a more solid rack. Look for a lower gauge number; something like 11 or 12 gauge steel is robust and built to last. 14 gauge racks can work for beginner lifters but I think it’s better to save money and get a beefier rack starting out. That way you won’t have to replace it later down the road.
- Tubing Size – The size of the steel tubes matters too. Larger tubes, say 2×3 or 3×3 inches, offer more stability and often a higher weight capacity.
- Overall Build Quality & Company Reputation – Don’t skip on research. Go for brands known for their quality. Read reviews, ask around in the community, and check the company’s history of customer support and product durability.
Consider Safety and Stability
When it comes to your workouts, safety and stability aren’t just important; they’re everything. Here’s how you make sure your rack measures up:
- Weight Capacity – Check the rack’s weight limit. It should comfortably handle more than your heaviest lift. This isn’t just for safety; it’s about giving you room to grow stronger without needing a new rack.
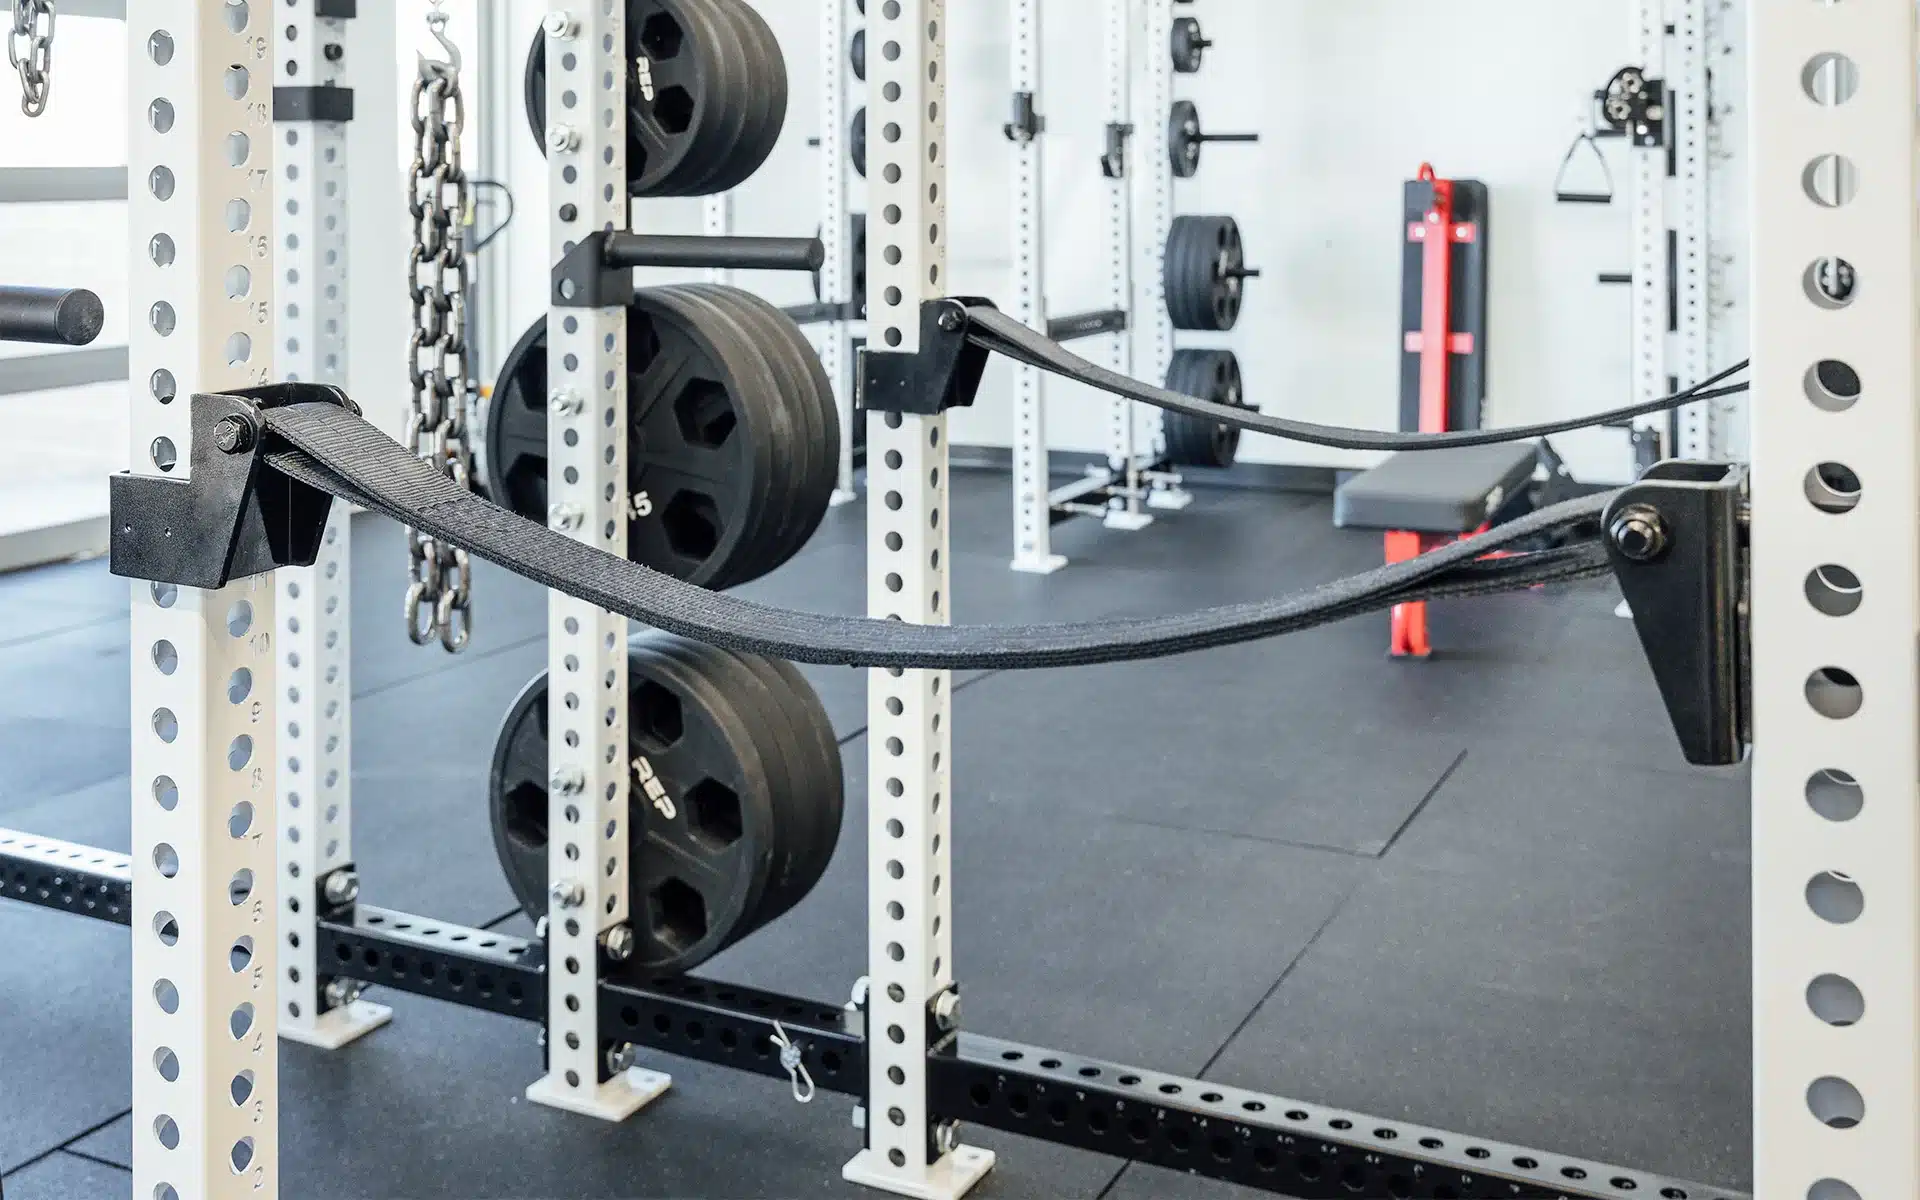
- Safety Features – Look for racks with solid safety bars or straps. They catch the bar if you miss a lift, protecting you from injury. Also, ensure the rack is stable. It shouldn’t wobble or feel shaky during your workouts.
Rack Features
Most racks come with features that can really fine-tune your training experience. Here’s what to look out for:
- Hole Numbering, Sizing, & Spacing – Clear numbering is crucial for quick and secure adjustments. Look for racks with 1” or 5/8” hole sizes as these are the most common. Also, closer hole spacing allows for more precise placement of safety bars and J-hooks, enhancing your workout’s safety and efficiency.
- Finish Options – A good finish isn’t just about looks; it protects your rack from rust and wear. Powder-coated finishes are durable and come in various colors to match your favorite color scheme.
- Rack Accessories – Explore the world of rack accessories. Things like dip bars, plate storage, or landmine attachments can really expand your workout possibilities.
- Attachment Compatibility – Ensure your rack plays well with any current or future accessories you might want. 3×3” racks are going to have the highest compatibility possible with 2×3” racks coming in right behind them.
- Customization Options – Some racks offer customization for everything from color to size. If you want your gym to feel uniquely yours, this is a feature worth considering.
Financial Aspects
When it comes to buying a rack, keeping an eye on the financial aspects is key. Here’s how to navigate the costs without compromising on quality:
- Set Your Budget – Know what you’re willing to spend. A solid power rack is an investment, but it’s essential to find a balance between quality and affordability.
- Warranty – A good warranty signals a company’s confidence in its product. It’s not just about the duration; understand what’s covered. In general, a lifetime warranty on the frame is the bare minimum I would recommend.
- Verify Shipping Costs and Options – Shipping can add a significant amount to the total cost. Check out the options and be aware of any extra charges for delivering heavy equipment.
- Return Policy – Familiarize yourself with the return policy. It’s your safety net in case the rack isn’t what you expected or if there are any issues.
Why Buy A Rack?
When you’re setting up a home gym, choosing the right equipment is crucial, and a rack is at the top of that list. From ensuring safety during solo sessions to offering a variety of exercise options, a solid rack will always be a great investment for your training.
- Multi-functional Versatility – Power racks offer unparalleled versatility, allowing you to perform a wide range of exercises including squats, bench presses, and pull-ups, all with a single piece of equipment.
- Convenience at Home – Say goodbye to gym commutes. With a power rack in your home, your workout is just a few steps away. This is by far the most important reason I chose to invest in my home gym over a decade ago.
- Safety and Security – Built-in safety features, such as adjustable safety bars and sturdy frames, ensure a secure workout, reducing the risk of injury.
- No More Waiting – Forget waiting for equipment at the gym. Your rack is available on your schedule, maximizing your workout efficiency.
- Long-Term Durability – Power racks are a one-time investment, typically built to endure, providing you with years of reliable use.
- Drama-Free Zone – Avoid the social dynamics and potential conflicts often found in public gyms. Your gym is a peaceful, stress-free environment.
- Independence in Training – Eliminate the need for a spotter. Pretty much all racks are designed for safe solo workouts, giving you the freedom to train anytime.
- Economic Efficiency – While providing a comprehensive workout solution, power racks are cost-effective, reducing the need to invest in multiple pieces of equipment.
- Personalized Space – Enjoy the privacy of your own workout area, where you can focus on your routine without distractions or interruptions.
- Space-Saving Designs – With options like folding racks, you can maximize your workout area even in limited spaces, making power racks suitable for various home environments.
- Customizable to Fit Your Needs – Many racks offer customizable options, allowing you to tailor your setup with attachments and adjustments that fit your specific workout preferences.
- Workout Consistency – Having a rack at home makes it easier to maintain a consistent workout schedule. Consistency is key after all.
Best Racks
There are a ton of great racks out there for all the major configurations you can get. The following are just some of the best options from the most popular brands.
If you want something that’s a little more comprehensive and the best of the best, check out my best power rack guide. It has options for every budget and use case so you’ll definitely find the best option for you.
Otherwise, check out the options below from some of the main players on the market.
- Best Rogue Fitness Racks
- Power Rack – RML-390F Monster Lite Rack
- Squat Stand – SML-2 90” Monster Lite Squat Stand
- Half Rack – HR-2 Half Rack
- Folding Rack – RML-3W Fold Back Wall Mount Rack
- Best REP Fitness Racks
- Premium Pick – REP PR-5000 V2
- Best Value – REP PR-4000
- Budget Option – REP PR-1100
- Best Titan Fitness Racks
- Power Rack – T-3 Series Power Rack
- Squat Stand – X-3 Series Tall Squat Stand
- Half Rack – X-3 Series Half Rack Conversion Kit
- Folding Rack – T-3 Series Folding Power Rack
- Best On Amazon
- Power Rack – Major Fitness Power Rack
- Best Combo Racks
Conclusion
Choosing the right rack is about ensuring it fits your space and supports your training so you can achieve your goals. From considering build quality, safety, and even financial aspects – choosing a solid rack will make your workouts far more efficient. Take your time, weigh your options, and choose a rack that stands strong with you, set after set, year after year.
Until next time,
-Dante