It’s an unfortunate fact of life, but regardless of the type of barbell you own, you’re going to have to clean it at some point.
Unless of course, you don’t care about the longevity and performance of your bar.
On top of that, you probably don’t want to be lifting with a rusty barbell.
So in this guide, I’m going to cover everything you need to know about cleaning your barbell.
Let’s get started!
RELATED – Best Barbells For Your Home Gym
Table Of Contents
- 1 Key Takeaways
- 2 Anatomy Of A Barbell
- 3 Why is Barbell Maintenance Important?
- 4 How Often Should Maintenance be Done?
- 5 Tools for Easy Barbell Maintenance
- 6 Barbell Cleaning And Maintenance
- 7 Cleaning Different Barbell Finishes
- 8 When Should I Replace My Barbell?
- 9 Tips To Extend Barbell Lifespan
- 10 Proper Barbell Storage
- 11 Frequently Asked Questions
- 12 Conclusion
Key Takeaways
| Key Question | Key Takeaway |
|---|---|
| What is essential for barbell maintenance? | Understanding barbell anatomy, regular cleaning, proper storage, and use of correct maintenance tools. |
| How do I clean different parts of the barbell? | Knurling: Brush and oil; Shaft: Wipe with oil; Sleeves: Clean and lubricate; End Caps: Regular checks. |
| Why is regular barbell maintenance important? | To prevent rust, ensure safety, maintain performance, extend lifespan, and preserve value. |
| How often should I maintain different barbell finishes? | Bare Steel: 1-3 weeks; Black Oxide/Zinc: 2-4 weeks; Chrome/Cerakote/Stainless Steel: 1-3 months. |
| What tools are needed for barbell maintenance? | 3 in 1 Oil, Safety Glasses, Snap Ring Pliers, Gloves, Microfiber Rag, and Bristle Brush (type varies). |
Anatomy Of A Barbell
Understanding the anatomy of a barbell isn’t just for show; it’s the bedrock of effective maintenance.
Think of it as knowing your car’s engine before you pop the hood – the better you know it, the better you can care for it.
- Knurling – That gritty, crosshatched pattern under your palms? That’s the knurling. Crucial for grip, sure, but also a hotspot for grime and chalk build-up. Regular cleaning of the knurling is vital to prevent corrosion and ensure a lasting grip.
- Shaft – The heart of the barbell, the shaft, requires consistent care to maintain its integrity and performance. From preventing rust to preserving the whip (flexibility), the shaft’s maintenance is key to the bar’s overall longevity.
- Sleeves – Where the weights call home. Sleeves take a beating with every load and unload. Regular maintenance, including cleaning and checking for wear, ensures they continue to rotate smoothly and hold weights securely.
- Bearings and Bushings – The unsung heroes inside the sleeves, allowing them to rotate freely. Neglecting the bearings and bushings can lead to a stiff, unresponsive bar. A well-oiled bearing or bushing is essential for lifts that require a quick spin of the bar.
- Snap Ring – These small components keep everything together, literally. Ensuring snap rings are secure and intact during maintenance checks is crucial to prevent dangerous sleeve dislodging.
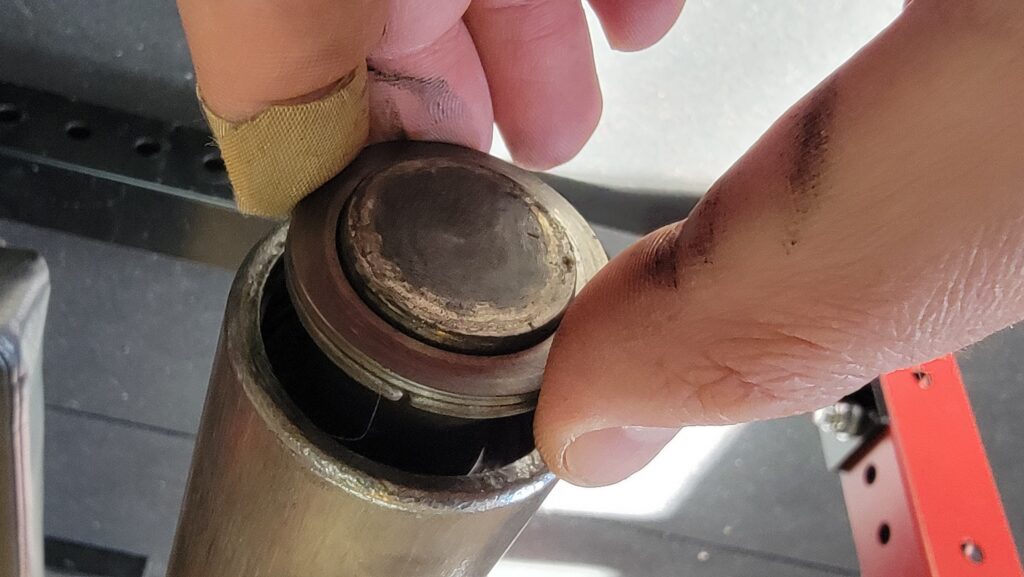
- End Caps – Beyond branding, end caps protect the bar’s interior from dust and debris. Regular checks and cleaning of end caps are essential to safeguard the longevity of the bar’s inner mechanisms.
Proper care and regular check-ups of these components can make your barbell a lifelong gym companion.
Why is Barbell Maintenance Important?
Barbell maintenance is not just about keeping your bar looking good; it’s about ensuring safety, longevity, and optimal performance.
| Importance of Barbell Maintenance | Explanation |
|---|---|
| Preventing Rust and Corrosion | Regular maintenance prevents rust and corrosion, crucial in humid environments or when using chalk, to maintain both appearance and structural integrity. |
| Ensuring Safety | Loose sleeves, worn bearings, or a slippery shaft due to lack of cleaning can lead to accidents. Regular checks ensure safety. |
| Maintaining Performance | Proper lubrication and cleaning are essential for the smooth rotation of the sleeves, affecting lifting technique and results. |
| Extending Lifespan | With proper care, a high-quality barbell can last decades, making it a wise long-term investment. |
| Preserving Value | A well-maintained bar retains more value and fetches a higher price when selling or upgrading. |
| Enjoyment of Use | Using a properly cleaned barbell enhances the overall lifting experience, offering both functional and aesthetic satisfaction. |
Regular maintenance is not a chore; it’s a ritual that pays dividends in the form of safety, performance, and longevity.
How Often Should Maintenance be Done?
This table serves as a handy guide for barbell owners to understand how often they should maintain their equipment, depending on the type of finish it has.
| Finish Type | Maintenance Frequency |
|---|---|
| Bare Steel | Every 1-3 weeks* |
| Black Oxide, Zinc | Every 2-4 weeks* |
| Budget Chrome | Monthly, more often as it flakes |
| Hard Chrome, Cerakote, Stainless Steel | Every 1-3 months* |
Regular maintenance according to these intervals will help ensure the longevity and optimal performance of the barbell.??
Tools for Easy Barbell Maintenance
Keeping your barbell in prime condition requires the right tools.
Here’s a list of the essentials for easy barbell maintenance, along with where to buy these supplies and a general idea of the price range.
3 in 1 Oil
- This is your go-to for lubricating bearings and protecting the bar from rust. It’s versatile and effective.
- Where to Buy – Hardware stores, online retailers like Amazon, or sports equipment shops.
- Price Range – Generally around $5 – $10 for a standard bottle.

Safety Glasses
- A must when you’re dealing with small parts or spraying lubricants to protect your eyes.
- Where to Buy – Any standard hardware store or online.
- Price Range – $5 – $20, depending on the brand and quality.
Snap Ring Pliers
- Essential for removing or adjusting the snap rings on your barbell for deep cleaning or maintenance.
- Where to Buy – Available at hardware stores or online.
- Price Range – Typically between $10 – $30.
Gloves
- Protect your hands from grease, oil, and dirt during maintenance. Nitrile gloves are a good option.
- Where to Buy – Hardware stores, pharmacies, or online.
- Price Range – Roughly $10 – $20 for a box.
Microfiber Rag
- Ideal for wiping down the bar without leaving residue or lint.
- Where to Buy – Automotive stores, department stores, or online.
- Price Range – Around $5 – $15 for a pack.
Nylon, Brass, or Steel Bristle Brush
- Choose the brush type based on your barbell’s finish. Nylon for gentler cleaning, brass or steel for tougher jobs.
- Where to Buy – Hardware stores, online, or specialty fitness equipment retailers.
- Price Range – Approximately $5 – $20, depending on the type and quality.
Remember, investing in these tools is investing in the longevity of your barbell. Regular maintenance not only keeps it functioning well but also preserves its appearance and value.
Vinegar
Soaking your barbell in vinegar is one of the best ways to clean your bar and is pretty cheap overall.
You can either completely immerse it if you have a big enough spot to do so or use the paper towel method which I’ll cover later.
Barbell Cleaning And Maintenance
Keeping your barbell in top shape is a mix of art and science. Let’s break down the process into a step-by-step guide.
This routine is perfect whether you’re doing a quick clean-up or a full-blown restoration.
Simple Clean Method
This first method requires using 3 in 1 oil, a microfiber rag, and a wire brush to scrub out the rust.
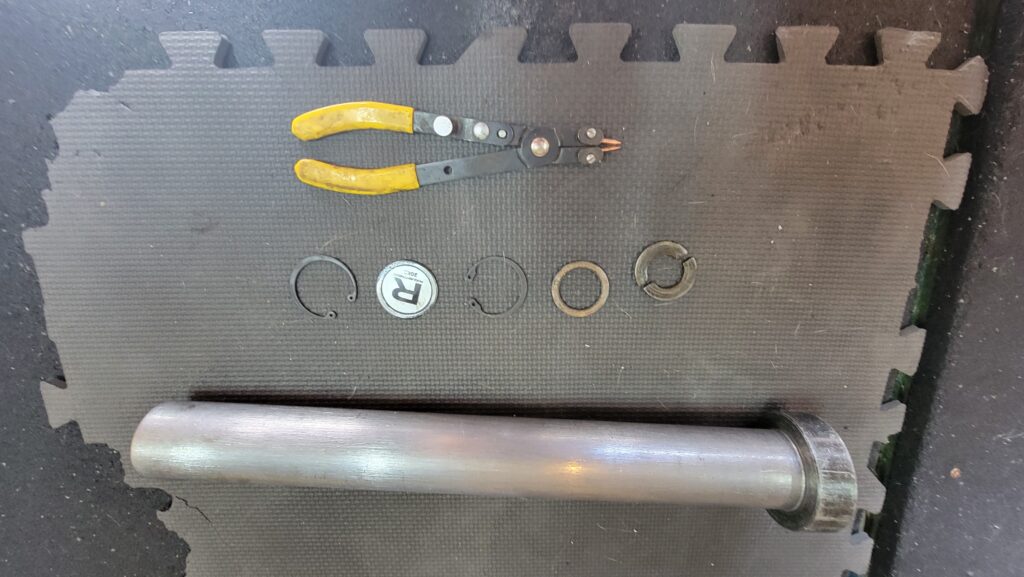
Barbell Sleeve Disassembly & Cleaning
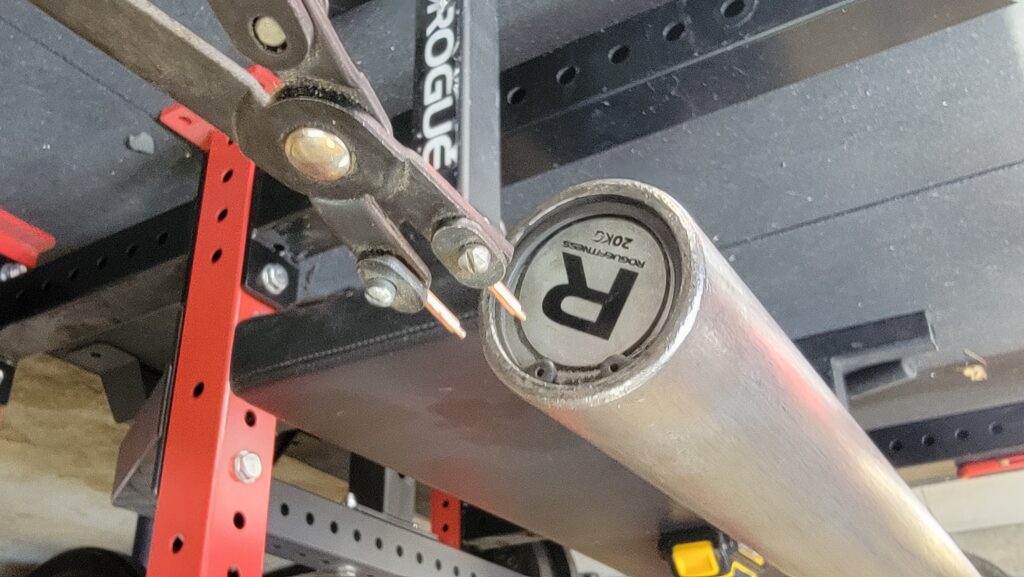
- Step 1 – You need to remove the snap rings with snap ring pliers.
- These can be sent flying when pulling the ring out so watch out!
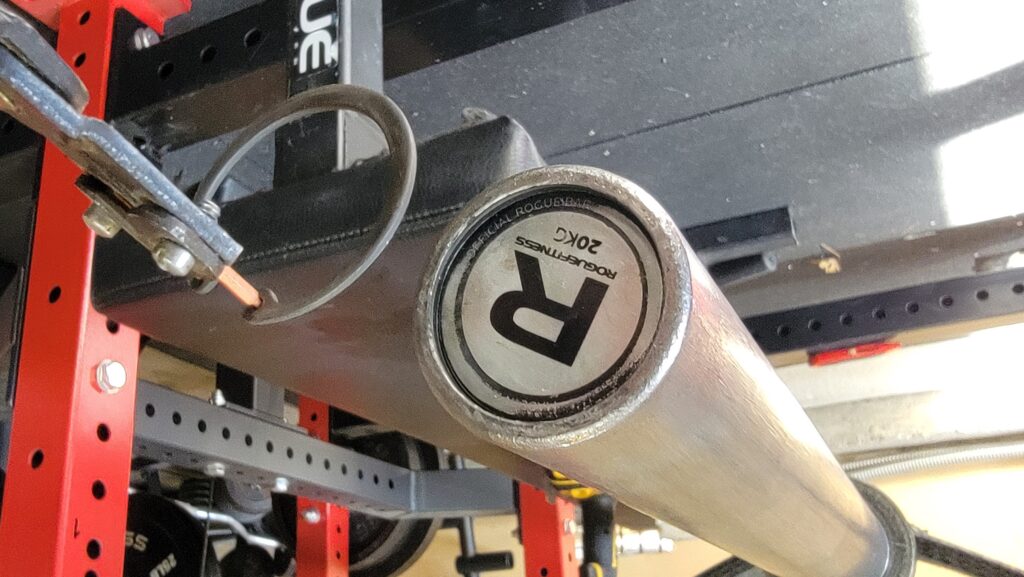
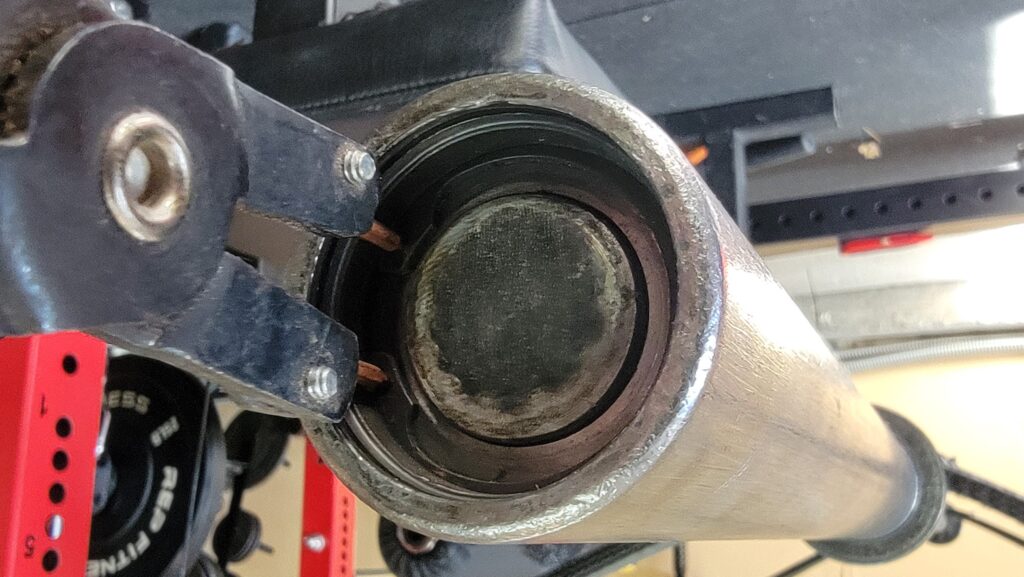
- Step 2 – With the snap ring removed, slide the end cap off.
- Some bars have a second snap ring inside the end cap.
- Repeat the process from before to remove it.
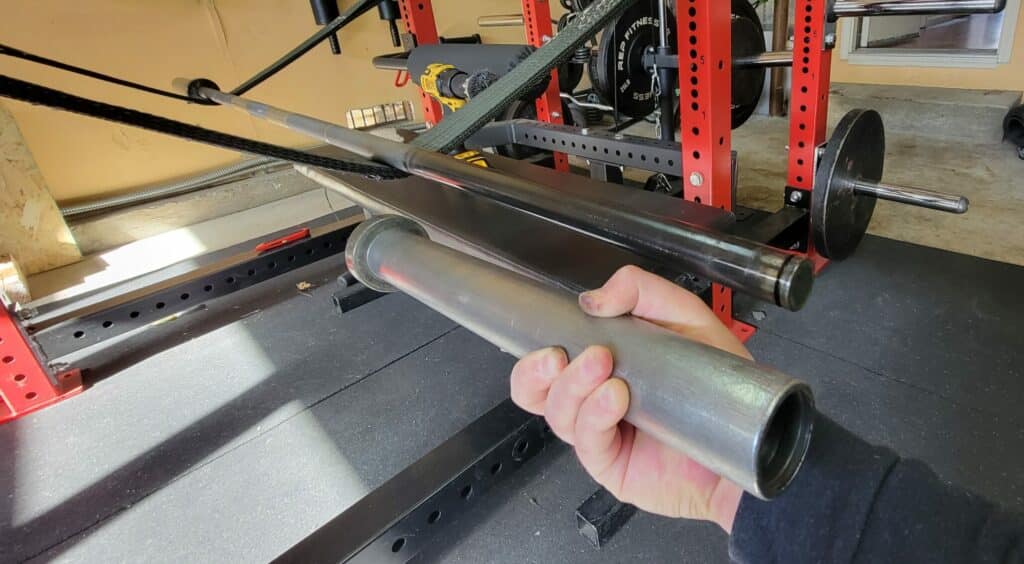
- Step 3 – Wipe the bar and sleeves down.
- Before doing any deep cleaning, simply wipe everything down with a cloth.
- You should wipe down the bar underneath the sleeves as well as the sleeves themselves.
- Step 4 – Re-lubricate the sleeves with oil.
- Apply 3-in-1 oil to the sleeves and the surface underneath the sleeves.
- Spread the oil with your cloth from before to make sure everything is uniform and wipe off the excess.
- Step 5 – Reassemble the sleeves.
- Slide the sleeves back onto the bar.
- Replace the end cap and snap rings.
- You’re done!
Cleaning Barbell Knurling & Shaft
Your bars knurling and shaft are going to have the most debris and rust buildup.
This is because you are directly coming into contact with this part of the bar with your hands.
Your sweat and skin are left behind each time you use it so it makes sense.
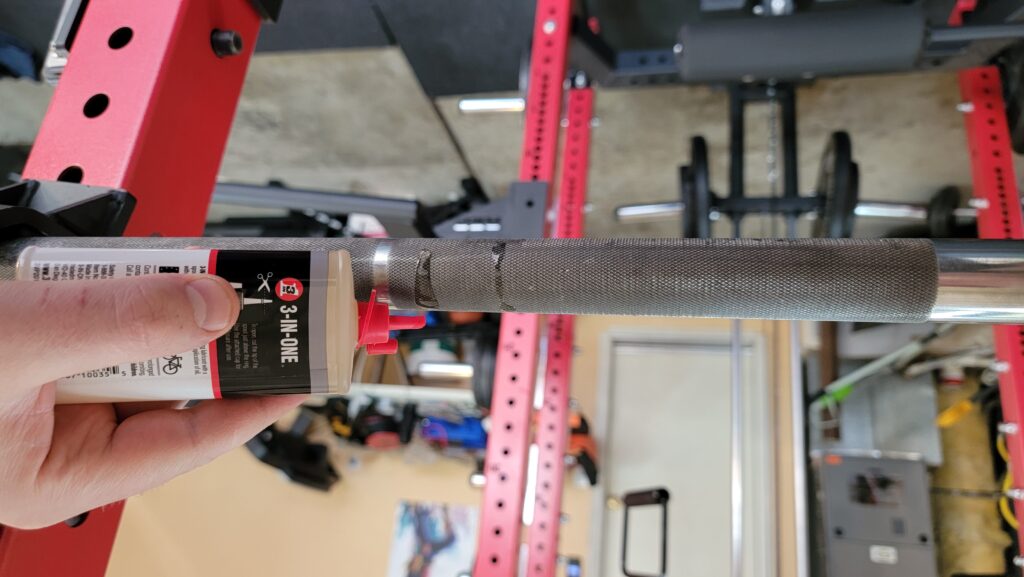
All you need to do to clean this area is apply the same oil as before and use your wire brush to clean out the rust/dust/debris, whatever the hell is on it basically!

While doing this, you want to rotate the bar so you can clean the entire surface area of the shaft and knurling.
Deep Clean Method
If you want to deep clean your bar as much as possible, a vinegar bath is going to be your best option.
While this method might take more time to complete, it’s ultimately worth it if you want to restore the barbell to the best condition possible.
Necessary Supplies
- A gallon of vinegar (no shit)
- Nylon, Brass, Or Stainless Steel Brush
- 3-in-1 oil
- Microfiber cloth
- Spray bottle with a combination of baking soda and some high quality H20
- Some type of container or box big enough for the entire bar lined with big trash bags
- If you don’t have access to this, you can use paper towels and plastic wrap instead.
Deep Cleaning Process
- Step 1 – Use the nylon brush to do a quick sweep of the barbell.
- You don’t have to do a full deep clean with lots of elbow grease, that’s what the vinegar bath is for.
- Just get the easily removable debris off, especially around the knurling.
- Step 2 – Get your bar ready and fill up the bath.
- Disassemble your barbell sleeves as outlined in the section above.
- If you have a big box, line it with garbage bags and place all your barbell components inside. Then just fill it up with vinegar until everything is submerged.
- If you don’t have a large enough box, you can use paper towels dipped in vinegar.
- Cover each section with paper towels and wrap it up with plastic wrap.
- Step 3 – Wait overnight for the vinegar to deep clean your bar.
- Step 4 – Clean off the vinegar quickly!
- This is the most important step, if you wait too long after removing the barbell components from the vinegar, it’ll evaporate and allow flash rust to rear its ugly head.
- You could potentially have even more rust than when you started so don’t screw this step up!
- Just get a hose to wash off the vinegar and then spray some of the dissolved baking soda on it and wipe it off with a cloth.
- Final Step – Final Grease Cycle
- Once the bar is fully dry, get more of your oil on there and use your microfiber cloth to spread it evenly across your bar and wipe off the excess.
- And that’s it!
Restoring Bare Steel Bar
Restoring a bare steel barbell is a task that requires attention to detail and a bit of patience. Here’s how you can bring your bar back to its former glory:
- Step 1 – Scrubbing with a Brass Brush
- Start by using a brass brush to scrub the bar. This will help in removing surface rust and any accumulated grime. Focus on areas with visible rust or buildup, as these are more prone to damage.
- Step 2 – Cleaning with Oil
- After brushing, apply a small amount of 3-in-1 oil to the bar. This will aid in loosening any lingering rust or dirt. Use a clean rag to spread the oil evenly, ensuring you cover the entire bar, especially rust-prone areas.
- Step 3 – Wiping Down the Bar
- Use a fresh rag to wipe down the bar after applying the oil. This step is crucial for removing the loosened rust particles and any excess oil. It leaves a thin protective layer on the bar to guard against future rust.
- Step 4 – Lubricating the Bushings or Bearings
- If your barbell has bushings or bearings, these will need to be lubricated. Apply a moderate amount of oil to these components. This step is important to reduce friction and wear. Be sure to rotate the sleeve as you apply the oil to ensure it spreads evenly.
- Step 5 – Final Wipe and Inspection
- Give the bar a final wipe to remove any remaining oil and ensure it’s completely clean and dry. Inspect the bar thoroughly for any missed spots or residual rust. If necessary, repeat the oiling and wiping process.
- Regular Maintenance Reminder
- Once your bar is restored, it’s crucial to maintain it regularly. This includes wiping it down after each use, especially if you use chalk, and conducting thorough cleaning and oil treatments periodically based on your barbell’s specific needs.
Cleaning Different Barbell Finishes
This table offers specific recommendations for the type of brush to use and other care tips for different barbell finishes.
It’s tailored to help you maintain the integrity and appearance of your barbell, based on the finish type you have.
| Finish Type | Recommended Brush Type | Additional Cleaning Rules |
|---|---|---|
| Bare Steel | Brass Bristle Brush | Frequent oiling to prevent rust; avoid harsh chemicals |
| Black Oxide | Nylon Bristle Brush | Oil regularly; avoid abrasive materials |
| Zinc | Nylon Bristle Brush | Moderate oiling; gentle cleaning to preserve finish |
| Budget Chrome | Nylon Bristle Brush | Gentle cleaning; oil as chrome flakes off |
| Hard Chrome | Brass or Stainless Steel Bristle Brush | Regular oiling; can withstand more rigorous cleaning |
| Cerakote | Soft Nylon Bristle Brush | Avoid abrasive tools; oil sparingly |
| Stainless Steel | Nylon or Soft Bristle Brush | Minimal oiling; avoid strong solvents |
When Should I Replace My Barbell?
When it comes to deciding when to replace your barbell, there are several factors you should consider:
Wear and Tear – Over time, any piece of equipment starts to show signs of wear and tear. Visible rust, deep scratches, or dents in the bar are common signs. If these signs are affecting the functionality of the bar, it may be time to replace it.
Reduction in Spin – The barbell sleeves should spin smoothly to accommodate the rotation of the weights during lifts. If the spin of your barbell is noticeably reduced or the sleeves do not spin freely, it might be time to replace the barbell or at least the sleeves.
Barbell Flexibility – Barbells are designed to flex and return to their straight shape after a lift. If the barbell becomes bent or does not return to its original shape, this is a clear sign that it needs to be replaced.
Comfort and Grip – The knurling (textured areas where you grip the bar) can wear down over time. If the bar becomes uncomfortable to hold or it slips during your workouts, it could be a sign that you need a new one.
Cracks or Fractures – If you notice any cracks or fractures in the barbell, replace it immediately. These could potentially cause the barbell to break during use, which could lead to injuries.
Upgrade – Finally, you might want to replace your barbell if you are looking to upgrade to a higher quality bar, or if your lifting needs have changed. For example, if you’ve started Olympic weightlifting, you may need a bar with more whip (flexibility) and spin than a standard powerlifting bar.
Tips To Extend Barbell Lifespan
As an experienced lifter and home gym owner, I understand the importance of smart barbell use.
It’s not just about how you lift; it’s also about how you treat your equipment when you’re not lifting.
Let’s cover important tips that will help you avoid damage and ensure the longevity of your beloved barbell.
- Avoid Metal on Metal Contact:
- Metal-on-metal contact is a quick way to damage your barbell. When racking or unracking, be gentle to avoid chips and scratches. This is crucial for maintaining the integrity of the bar’s finish and preventing rust.
- Use Protective J Hooks and Safety Straps:
- Invest in J hooks with a protective lining (like UHMW plastic) to shield your bar from direct metal contact. Similarly, using safety straps instead of metal safety bars in your rack can reduce the risk of damage during failed lifts or reracks.
- Proper Use of Collars and Bar Jack:
- Collars are essential for keeping weights securely in place, which helps in balancing the bar and preventing it from warping. A bar jack, especially for heavy deadlifts, can be a back-saver and also prevents the bar from bending or rolling, reducing wear and tear.
- Recommendations for Barbell Storage and Handling:
- Storage is key. Store your barbells horizontally, preferably on a rack, to distribute weight evenly and prevent bending. Avoid vertical storage if possible, as it puts pressure on one end of the bar. Ensure that the storage area is dry to avoid rust, and never store your bar with weights loaded on it, as this can warp the bar over time.
Proper Barbell Storage
How you store your barbell can significantly affect its longevity and performance. Let’s dive into the do’s and don’ts of barbell storage, focusing on the best practices and what to avoid.
How Not To Store Your Barbell
- Avoid Vertical Storage – Storing a barbell vertically can put undue pressure on the bearings or bushings at the bottom, potentially warping the bar over time.
- Don’t Leave Weights On Bar – Keeping weights on your barbell while storing can bend the bar, especially over prolonged periods.
- Stay Away from Moist Areas – Storing a barbell in damp or wet areas, like a basement or outdoor shed, can expedite rusting and corrosion.
- No Rough Surfaces – Resting the barbell on concrete or metal surfaces can scratch and damage the finish.
The Correct Way To Store Your Barbell
- Horizontal Storage – Ideally, store your barbell horizontally on a rack. This evenly distributes the weight and prevents bending.
- Consider the Environment – A dry, clean environment is key. Protect your barbell from dust and humidity, as these can cause rust and degradation.
- Protective Padding – If you’re using a rack, ensure it has protective padding to prevent scratches on the barbell.
- Regular Checks – Even in storage, periodically check your barbell for signs of rust or wear and perform necessary maintenance.
Frequently Asked Questions
Conclusion
I hope this guide helped you figure out the steps you need to take to keep your barbell in good condition.
Whether you’ve been diligent in your barbell cleaning routine or, like many of us, have delayed it a bit too long, the important thing is that you now have the know-how to get it done right.
Remember, a well-maintained barbell is key to a successful and safe lifting journey.
Until next time,
-Dante